
fused art quilts from photographs
Special notes directly from Sandra MollonDescription of Workshop:
Learn to adapt a photograph into a realistic art quilt. Workshop participants select an image to work from, enlarge it, and trace a pattern from it. Another option is to use any pattern by Sandra, which may be appropriate for beginning students who do not have an image they want to use. Cutting your pattern, choosing fabrics and fusing them into place, using media, and quilting techniques are all covered during the workshop.

Getting Started
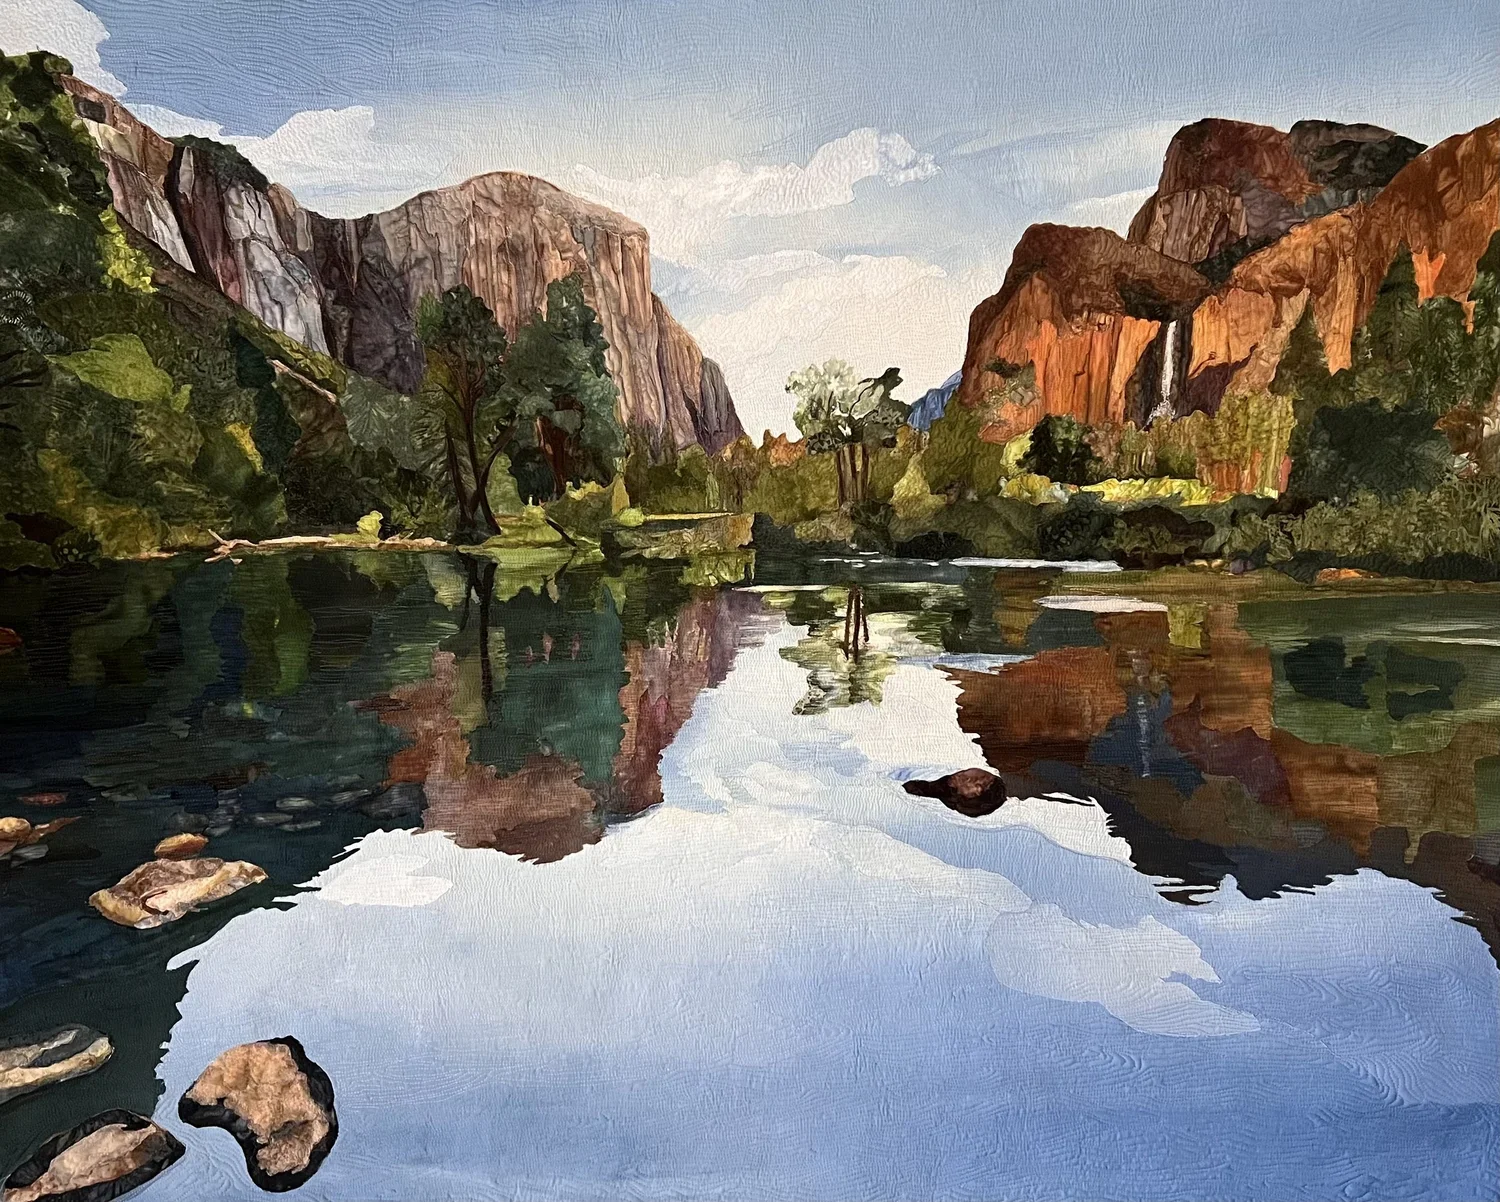
If you are working from your own photograph, be sure you have selected one you would enjoy making, with clear details (good resolution) and a subject that would be interesting. Unless you have taken a class with me before and have become very comfortable with the process, I recommend a simple subject. What is a simple subject? One with significantly fewer details. Look at the rocks above—while the subject matter is wonderful, it doesn’t have lots and lots of tiny fabric changes. If you are unsure about your image and want advice, please email me the photo (ideally at least 4 weeks in advance). I highly recommend that you email me your images if you have never done this process. Please limit the number of images you send to 2 or 3 of your favorites.
Use the email address below:
Kim@50acrewoods.net with subject line “Photos for Sandra Mollon’s review”
If you are using someone else’s photo, you should get permission from them before you start. I often get that in writing, as I usually enter my quilts in large shows that may require written permission.
Once you have selected your photo, you will need to print out the photo in color in \whatever size you want the finished quilt to be (Hint: Larger pieces are often easier to work from than smaller pieces, which can be tedious to cut.)
I am doing most of my large printing at VistaPrint.com. Find the tab for posters, select your size and orientation, and upload your image. I try to buy the cheapest full-color type (semi-gloss) available. If the resolution is poor, they will usually not allow it to be used. Additionally, I have used Blockposters.com—the website has step-by-step instructions for enlarging your picture and printing it out on copy paper in blocks. When printed, you can trim and tape the individual sheets together in the finished size you selected.
If you choose to have your image printed locally, it is important to ask about paper thickness. Thinner paper is easier to trace through on a light box and is also inexpensive. Please do not try and work from a grayscale enlargement. You can use blueprint paper (it works great!), but in color.
You can also print a good copy of the photograph on photo paper (about 8 x 10” is fine), as a reference photo for color correction to have nearby, in case your enlargement is not color correct, or bring an iPad or tablet.
To use your time in class wisely, I recommend tracing in advance of the workshop. I have a video link ready to email to all participants at least one month prior to the workshop. This video covers selecting an image, choosing fabrics, and tracing.
Tracing the lines and shapes you can see in the image is an important step in the process.
If your image is wider than 18” in any direction, you may need to use masking tape to tape a second sheet of freezer paper butted up next to the first. Place your photo on a light box or taped to the window. Carefully trace every shape and value change using a pencil. Bring the enlargement to the workshop along with the traced drawing on freezer paper. If you do not have your tracing completed in advance, you may want to bring a light box for the workshop.
Supplies Needed
Misty Fuse fusible web: I prefer this type because it doesn’t seem to build up in your machine, or make your needle gummy, or make the finished quilt rock hard like a piece of cardboard. You will want at least 4-5 yards.
Freezer Paper: You will need enough freezer paper to trace your entire image on. If your enlargement is bigger than the 18” wide freezer paper, you will need to tape pieces together—butt up—don’t overlap (use beige masking tape) to make a big enough piece.
A travel-size iron and ironing mat
Light box (Unless you complete the tracing in advance)
Pencil with an eraser
Scissors for cutting paper and fabric
A Slice ceramic craft knife (highly recommended). Do not use an Exacto knife with a metal blade—it can cut your fabric. I usually have some with me to sell. Contact Kim@50acrewoods.net to hold one for you.
Silicon Goddess Sheets or 1 yard Parchment paper (Reynolds brand or Costco brand parchment paper works well).
Fabric
You will need a piece of background fabric, a cotton solid, or a batik (choose a color that is often seen in the photo), the size of your enlargement (or pattern), with a bit left around the work to be trimmed off later—about an inch all around.
Other fabrics: Be sure to really look at your image and spend some time finding fabrics that are close in both color and values to what you see—batik fabrics are preferred for this process. Avoid solids, prints of all types, and fabrics that fray easily. Good quality hand-dyed cottons are great. This requires you to look at your image very carefully. The amounts of each depend more on your picture, so I cannot give you an exact amount. Have a large variety (something like 30-40 different fabrics, in 1/8-yard to 1/4-yard amounts), which is most likely enough. Make sure your fabric selection is varied in terms of batik types, color, and value—you will want batiks with a variety of visual textures.
Quilting
Generally speaking, the vast majority of students do not complete their quilt top in a workshop. Unless you have a very simple image, all quilting is completed later. If you do think you will get to that step, you can bring a sewing machine, thread, batting, and backing. Please email Kim@50acrewoods.net for further information regarding this step if you plan to bring a machine.
miscellaneous
I will bring the following media to the workshop for classroom use, but if you want your own set, read the information below:
Color Pencils, Ink, Fabrico Markers, and Oil Pastels are all media I regularly use and recommend good-quality color pencils like Prismacolor. Colors in the Fabrico markers will vary according to the image. Colors I use most often are: #152 Sand, #181 Cool Grey, #155 Truffle Brown, and #182 Real Black.

Loved This Class? Keep the Creative Momentum Going
Explore more hands-on workshops designed to inspire, challenge, and delight. From soulful stitching to wild color play, there's a class calling your name.